.svg)
.svg)

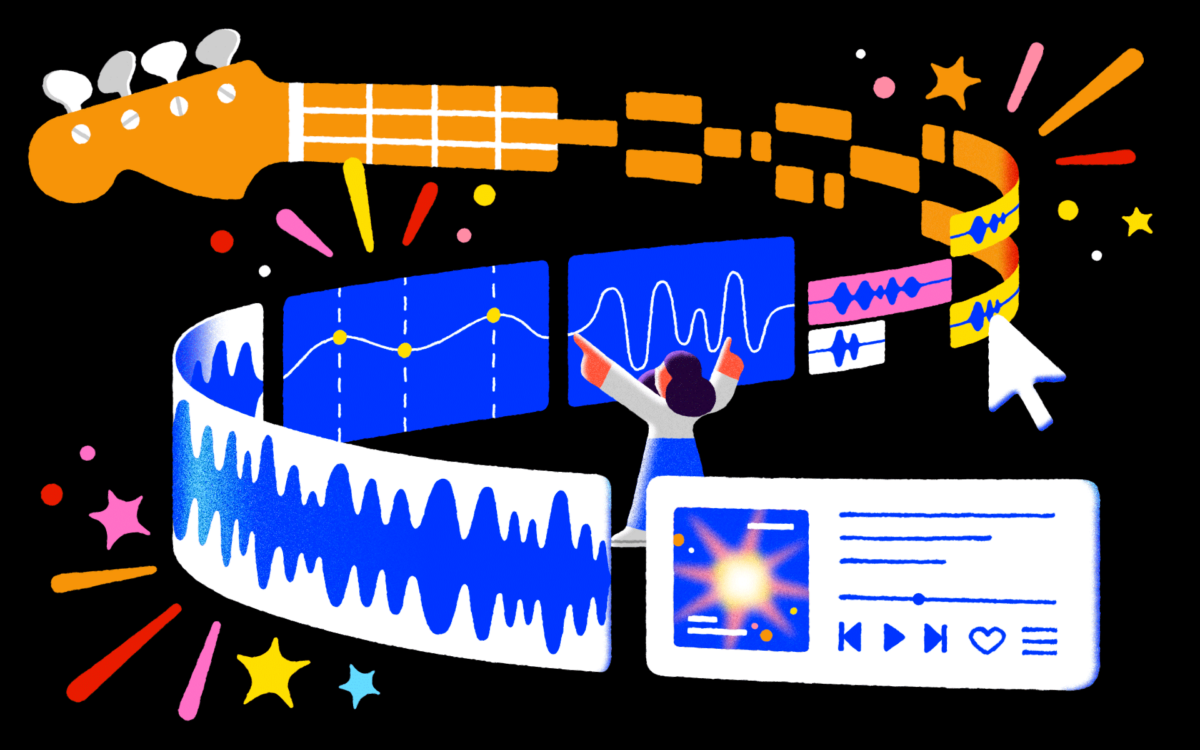
Illustration: Filip Fröhlich
Have you ever wanted to learn how to make music?
Whether you’ve played an instrument your whole life or have solely been an avid music listener, you may have wondered what it would be like to create your own music at one point or another (spoiler alert: it’s a deep—and at times challenging—but incredibly fun and rewarding experience). Fortunately, learning how to make music has never been easier than it is today. With nothing but a computer and some online resources (like this article you’re reading right now), you can get a start on—and go incredibly far in—your music creation journey.
In this in-depth guide, we’ll go over everything you’ll want to know get started with music production, from the tools you’ll need to the six creative steps you’ll take to make your own music. See the table of contents below to quickly navigate from section to section.
What you’ll learn:
- The tools you’ll need to make music
- The basics of how to make music in a DAW
- How to make a beat
- How to write a melody
- How to create a chord progression
- Developing your idea into a full track
- Mixing your music
- Mastering your music
Feeling excited? Let’s get started!
The tools you’ll need to make music
When you imagine a music producer, you might envision a spacious studio, sprawling mixing boards, and top-end mics in polished recording booths. While these are all great to have access to, you’ll be pleased to know that you can make some incredible music today with nothing but a laptop and a few pieces of software. Below, we’ll explore the core essentials you need to get started.
1. A DAW (digital audio workstation)
A digital audio workstation, or DAW for short, is the main software used in modern music production to record, edit, and arrange sounds. Think of it as the house within which you’ll build and arrange all of your ideas.
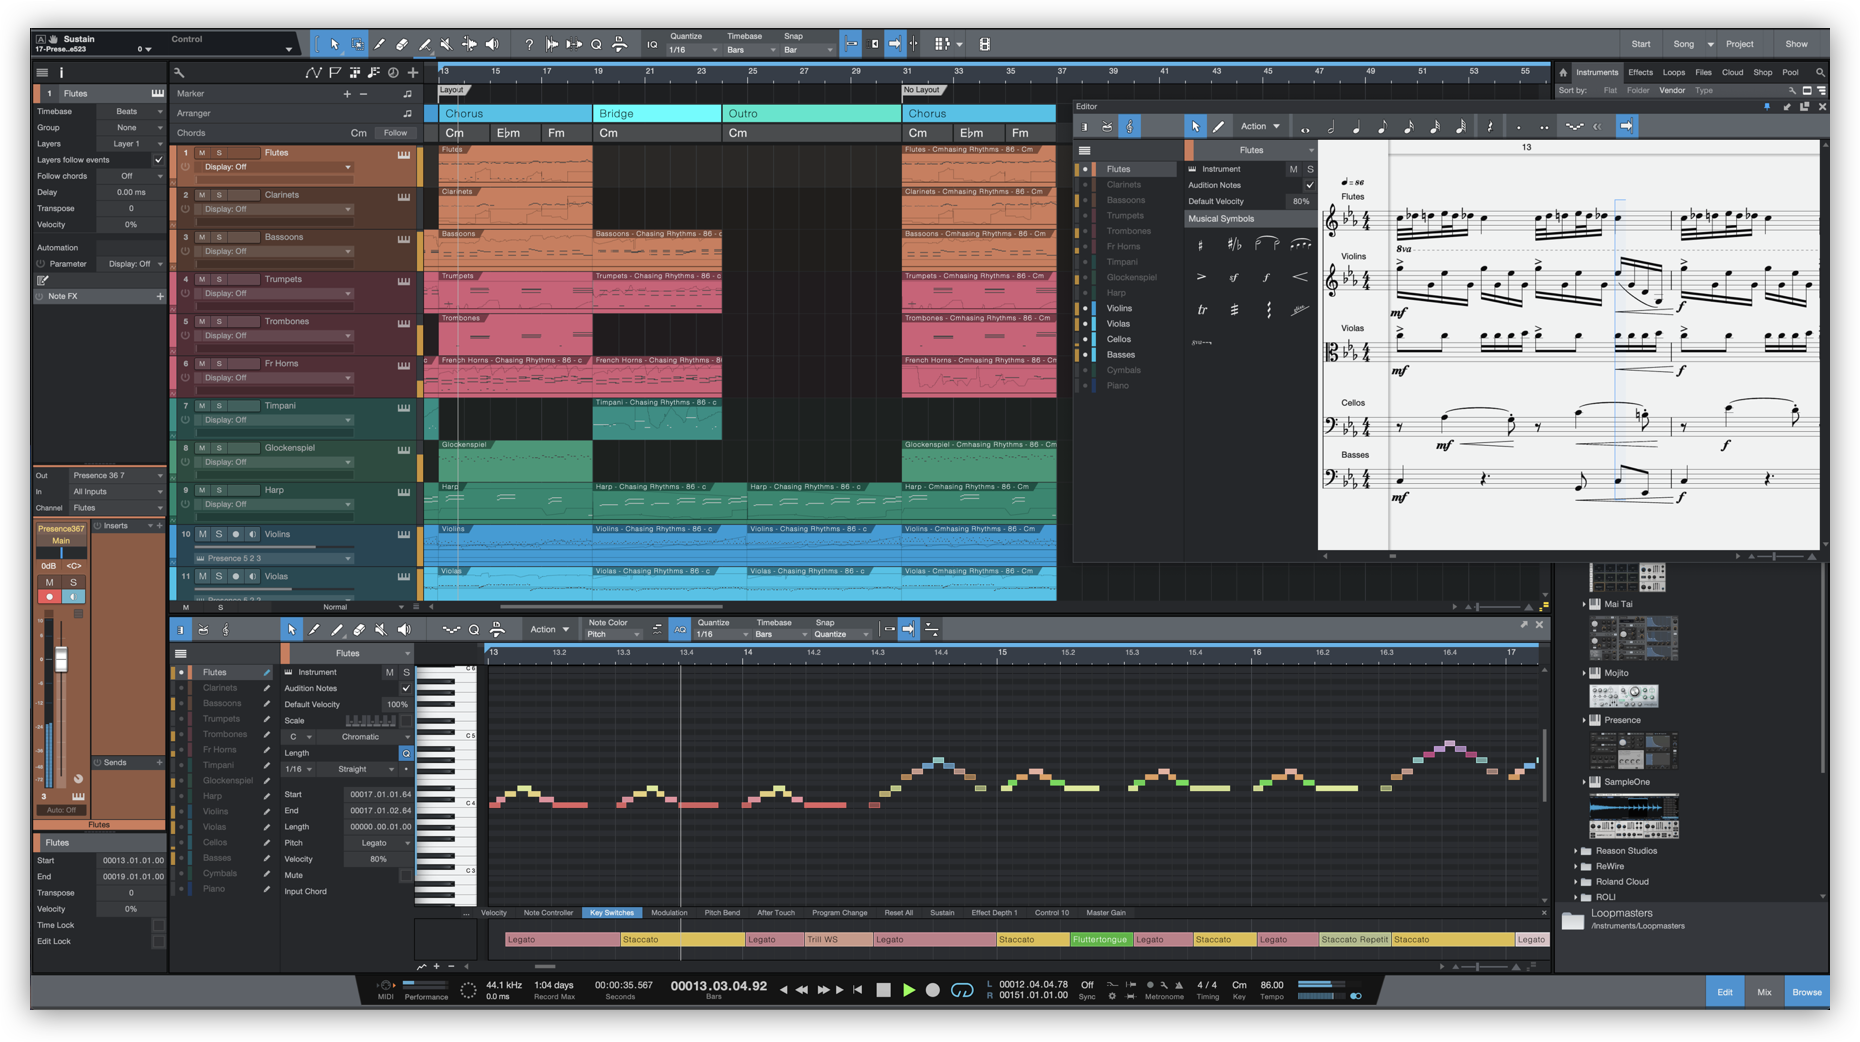
What a DAW typically looks like—this one is Fender Studio Pro.
How to choose a DAW
One of the first decisions you’ll have to make when learning how to make music is picking a DAW, since there are many options out there. If it brings you any comfort, great music can be created in any DAW. It’s ultimately just your canvas, and the art will come from you, not your tools. That said, you’ll (hopefully) be spending a lot of time in it, so you’ll want to pick one that excites and motivates you.
For you, this might mean picking a DAW that you simply find aesthetically appealing. Looking into what your favorite artists and producers are using might also spark ideas. Different DAWs have different price points, and some are exclusive to solely Mac or Windows, so these may be factors as well.
Popular DAWs for making music
Below, let’s take a look at a few of the most popular options to get some ideas flowing.
- GarageBand ($0): GarageBand is a DAW that’s widely recognized by creators and non-creators alike, thanks to the fact that Apple has pre-installed it to their devices for years. Although it’s exclusive to Mac / iOS and limited in features compared to some other options, its (highly) affordable price and mobile extension make it a popular choice for many beginners.
- Some records that were made with GarageBand: Rihanna’s “Umbrella” and Radiohead’s In Rainbows
- Logic Pro X ($200): Logic Pro X is in many ways a more advanced version of GarageBand. Also owned by Apple, Logic Pro is a DAW with a sleek UI and time-tested workflow.
- Some artists who’ve been seen using Logic Pro X: Calvin Harris, Jacob Collier, and FINNEAS
- Ableton Live ($0 – $749): Right up there in popularity alongside Logic Pro, Ableton Live is known for its emphasis on live performance as well as music production. Its unique workflows can be polarizing to some, but those who love it absolutely swear by it. It also has several different tier options (as do some others below), hence the variability in price.
- Some artists who’ve been seen using Ableton Live: Skrillex, KSHMR, and Imogen Heap
- Studio Pro ($99 – $399): While it may not be as widely known as Logic or Ableton, Fender Studio Pro (formerly Studio One) should not be underestimated. The forward-thinking DAW is designed to be intuitive, and also has some exclusive features that are great for beat making (Impact XT) as well as traditional scoring (Score View).
- Some artists who’ve been seen using Studio Pro: Maarten Vorwerk, Armin Van Buuren, and Rob Scallon
- Bitwig Studio ($99 – $399): Bitwig Studio almost feels more like a playground than a traditional DAW. From modular sound design to mapping for live sets, if you think you’re a type of person who really likes to get into the weeds, Bitwig Studio might be the workstation for you.
- Techno legend Richie Hawtin on Bitwig Studio: “An intuitive DAW that goes beyond everything else in the depth of its built-in modulation routings and access to the Grid.”
- FL Studio ($99 – $499): A DAW that seems to have a particularly strong user base around hip hop and EDM, FL Studio is adored for its sequencer workflows and lifetime free updates.
- Some artists who’ve been seen using FL Studio: Porter Robinson, Murda Beatz, and Soulja Boy
All of the paid options have free trials, so it could even be worth trying out a few to see which one feels the best to you. Bitwig Studio is specifically available on Rent-to-Own, which means you can pay smaller monthly installments towards ownership after your trial period ends, instead of immediately buying it outright. There are also ways to have Ableton Live Lite bundled for free when you get select products and services.
2. Sounds and plugins
While the DAW provides the virtual environment you’ll be working in, sounds and plugins are the elements you’ll need to use within it to actually produce audio. Sounds can appear in all sorts of forms. Perhaps they’re pre-existing loops that you can use for inspiration. Or, maybe they’re one-shots that are loaded into software instrument plugins that you can use to create your own melodies and chord progressions.
An example of a kick one-shot, or a type of audio sample that’s just a single strike. Arranging instances of these into a musical pattern is one way you can make your own music.
Speaking of which, plugins are smaller pieces of software that you use inside of your DAW to meet a variety of creative needs. Maybe they provide a virtual instrument (like a piano or bass) pre-loaded with sounds, which can allow you to compose parts for an instrument that you don’t physically own or know how to play. Or, maybe they allow you to use an effect like an echo or a reverb to color your sounds.
Know that most DAWs will come with a suite of built-in sounds and effects, so you don’t have to worry about acquiring them separately just to learn how to make music. However, as you continue your music production journey, you might also come across third-party plugins and sample libraries that you find appealing. Purchasing these will allow you to incorporate new sounds and effects into your DAW to expand your sonic horizons even further.
3. Physical instruments and hardware (optional)
Lastly, if you either sing or play a physical instrument, you can absolutely incorporate those talents into your own music. This is totally optional and not a requisite for digital music production, but can certainly be a valuable asset if you’ve got it.
If you want to sing in your own music, you’ll want to look into getting a microphone, an XLR cable (for most mics), and an audio interface. In the tutorial below, we walk through how you can connect these things to your DAW. That said, if you don’t have the budget or just want to get started right away, you can also get some decent recordings out of your phone or laptop’s built-in mics with the right setup.
These pieces of gear will also be relevant if you play pretty much any acoustic instrument (ex. violin, saxophone, trumpet, etc.). If you play an electric instrument like the electric guitar or bass, you can plug your TS cable directly into an interface instead, and then amplify your signal with plugins in your DAW. Last but not least, if you play the piano or keys, you might want to look into MIDI controllers (a lot of producers will also use these to get ideas down, even if the piano isn’t their primary instrument).
It’s also worth nothing that there’s an endless amount of hardware out there—whether it’s stereo speakers, effects units, or outboard gear—that can be used in conjunction with the DAW to create music. That said, they’re not by any means necessary for starting out, so we’ve omitted them here.
The basics of how to make music in a DAW
Once you pick your DAW, it’s time to open it up and get acquainted with it. While every workstation is different, they generally share a broad set of common views and workflows. Let’s take a look at a few key ones here.
1. The track / arrangement view
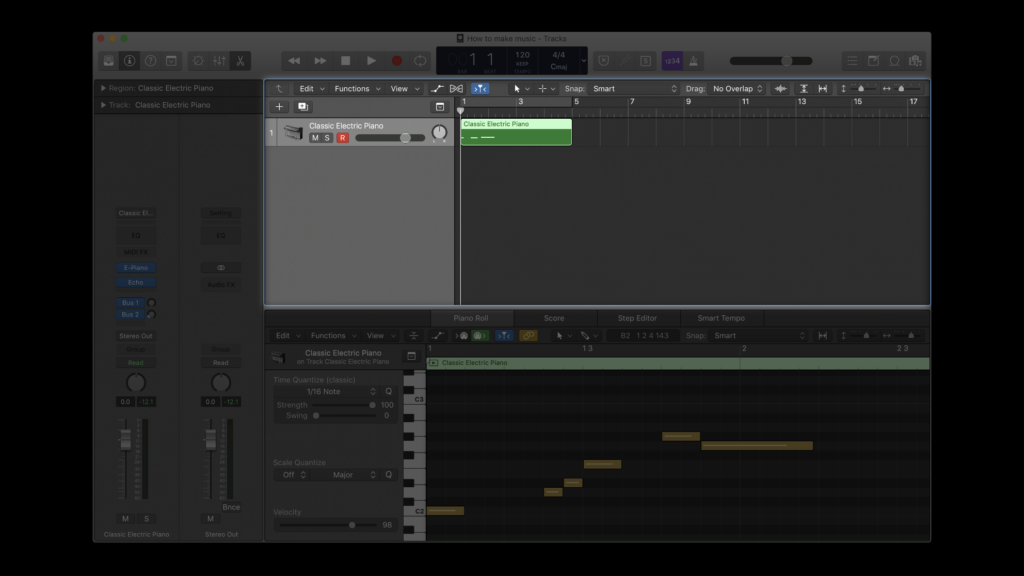
The track view in Logic Pro X.
First up is the track or arrangement view. This view is usually displayed by default, right when you open up the DAW. It’s where you’ll be seeing all of your different parts, as you layer multiple software instruments and audio tracks within your project. You’ll likely see some numbers across the top that denote musical measures, and once you hit the play button, the playhead thumb should start moving through them from left to right. As it does, you’ll hear any music you’ve created in time with it (we’ll see this in action later).
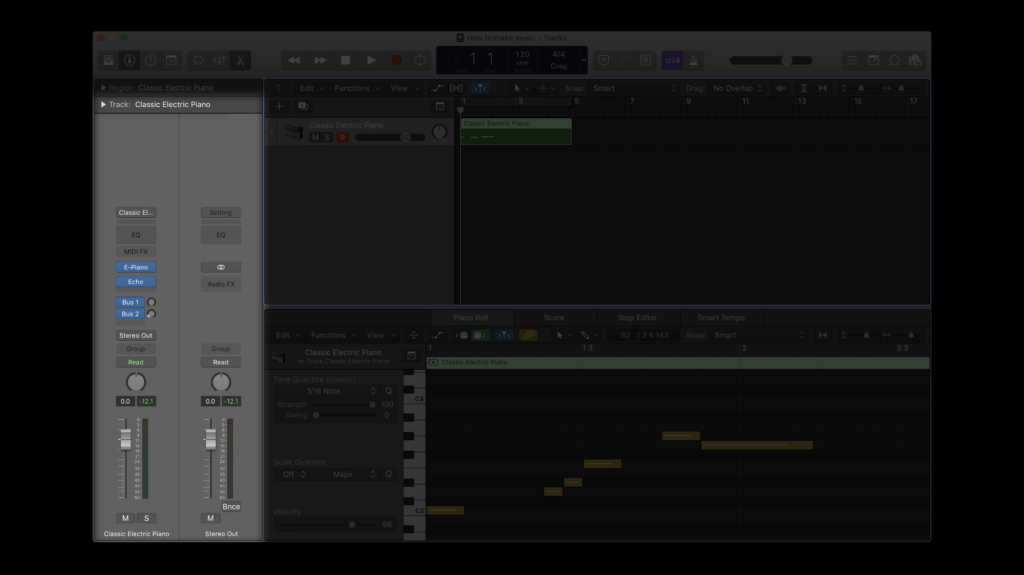
2. The MIDI editor / piano roll
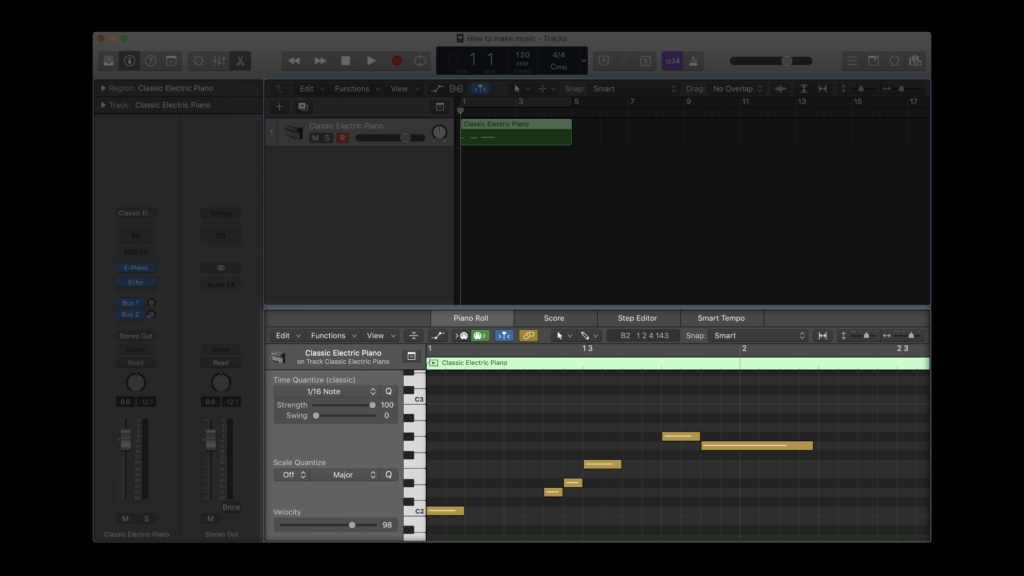
The piano roll in Logic Pro X.
The MIDI editor, also often referred to as the piano roll, is an area where you can add and edit MIDI notes. MIDI (Musical Instrument Digital Interface) is a type of digital protocol that allows us to capture information and relay instructions to our software instruments (and MIDI controllers, if you picked one up). In a DAW, MIDI allows us to easily compose our own beats, chord progressions, melodies, and more.
Unlike the track / arrangement view, you most likely won’t see this one right when you open up the DAW.
3. Channel strips
Channel strips in Logic Pro X.
Lastly, let’s take a look at channel strips. Each track you create will have one of these; you can use them to add audio effects to your sounds like echo, reverb, EQ, and more. The volume fader that’s often connected to them will also allow you to easily adjust a track’s loudness—though you can usually also do this in the track / arrangement view.
You might also come across all of your channel strips gathered together in a mixer view, in addition to a single master track that all of your individual channel strips feed into. These can be useful for mixing and mastering, two process that we’ll cover towards the end of this guide.
How to learn more about your specific DAW
First and foremost, don’t worry about learning every obscure detail about your DAW before you even start. Instead, the better approach may be to read or watch a short introduction, and then to look up specific things as questions arise. Just like you can’t learn how to ride a bike by reading a book, you can’t learn how to make music without actually doing it.
If you do get stuck on how to do something along the way, some great resources to lean on are official manuals (a criminally underutilized option) and popular YouTube videos. These may come up for you even today, since we ultimately won’t be able to cover the fine details of working in every DAW out there in the upcoming music-making portion of this tutorial.
That said, our approach to the six upcoming processes that unlock how to make music (making a beat, building a chord progression, writing a melody, developing your idea into a full track, mixing your track, and mastering your track) will be completely DAW-agnostic. This means you’ll be able to take all of this powerful information and apply it freely to the workstation of your choice.
With all of the tool gathering finally out of the way, let’s get started with what we came here for—learning how to make music!
How to make a beat
When looking at the building blocks of music ‘on paper,’ most compositional ideas can be broken down into three fundamental elements: rhythm, melody, and harmony.
These three elements aren’t mutually exclusive with one another. For example, melodies and chord progressions are also inherently rhythmic. However, there are some percussive elements that aren’t highly melodic or harmonic (perhaps performed by something like a drum kit) that drive the rhythmic energy of a track—we colloquially refer to these parts as the beat (not to be mistaken with the music theory definition of the same term).
What is rhythm?
Very simply put, rhythm is the aspect of music that tells us the timing for when notes and rests (silences) occur. Rhythm is something that’s intrinsic to our experience of music—most people will be able to appreciate and dance to a groove that outlines a great rhythm, even if they don’t make music themselves.
It doesn’t take a musical genius to hear that the simple but tight beat that kicks off “Billie Jean” is what immediately gets our heads nodding.
That said, as a music producer, you’ll benefit from having some amount of music theory knowledge around rhythms. For example, understanding what a measure and a quarter note are will allow you to better navigate your DAW and know how to position rhythms in it.
If you don’t have any prior exposure to these sorts of music theory terms, see our in-depth guide below to get caught up on the fundamentals of rhythm. Every concept is covered with both traditional sheet music and MIDI; feel free to focus on whichever system works better for you.
How to create a beat in your DAW
Once you have a grasp on the basic music theory of rhythm, you’ll want to create a new software instrument track in your DAW. Choose any drum kit that you like the sound of—you’ll be using it to sequence your own beat with MIDI notes. Note that there’s no rule that says you have to start with the beat when you make music. That said, many producers will build their songs around one, since it’s the foundation that ties everything together in many genres.
Below, you can see how we’ve used MIDI notes to arrange a combination of kicks, snares, and hi-hats to get a beat going:
Our groove might be a little faster than yours—that’s because we changed the tempo (musical speed) of our track by adjusting our project’s BPM (beats per minute) parameter.
For an even more detailed step-by-step guide on how to do this, check out our article on how to make a beat:
How to create a chord progression
Once you have a beat going, the next thing you can try out is outlining some harmony with a chord progression. A chord is a collection of pitches that form a single harmonic idea. Meanwhile, a chord progression is a succession of chords that serves as the harmonic backbone to a piece of music.
What is harmony?
Harmony refers to the simultaneous sounding of multiple musical notes. We hear it in almost all of the music we listen to, often outlined by instruments like the piano, guitars, synth pads, etc. For example, the chord progression performed by the piano in Adele’s “Hello” defines the harmonic structure of the song, while providing a nice bed for her stirring vocals.
A i – III – VII – VI chord progression—simple but powerful.
Similar to rhythm, there are also some music theory basics that help us understand how popular chords are structured. If you’re not familiar with what major and minor triads are, our introduction to harmony is also available below to help you out. And although we’re skipping ahead a bit in the context of this tutorial, our introduction to melody will also give you some definitions around terms like pitch, scales, and keys, if any of those come up along the way and you find yourself confused.
How to create a chord progression in your DAW
Now, it’s time to create a chord progression that moves in time with our established beat. While a progression can contain any number of chords, picking a pattern of four to loop is a good starting point. In the video below, you can see how we added a synth pad software instrument, and used it to build a simple but solid chord progression to pair with our beat:
We chose a i – VI – III – VII chord progression—all of the same chords as “Hello,” but in a different order and key.
If you’re not sure where to start, you’ll want to pick a major scale or minor scale to build all of your chords around. C major and A minor are great for beginners, since they consist of no sharps or flats (in other words, they solely use all the white keys on the piano). While this is a sweeping generalization with many exceptions, centering around a major scale might give you what’s commonly interpreted as a more “bright” or “happy” sound. Meanwhile, centering around a minor scale might give you what’s commonly interpreted as a “dark” or “sad” sound.
Looking up the chord progressions to your favorite songs might be one way to find inspiration. You can also see this tutorial to learn how to make music with the progressions that are most common for different genres. In it, we also include free MIDI files for various progressions, which you can use as starting points for your own music.
As you become more advanced, you might also try going beyond the pitches available in a major or minor scale by exploring borrowed chords, modes, and more—but that’s for another day. For now, just know that some chord groupings and patterns are more common than others.
How to create a bassline using your chord progression
Once you have a chord progression going, you can create a simple bassline by copying and pasting the chords onto a track containing a bass instrument. From there, just isolate the root notes and move them to a lower octave. You can find octaves by dragging notes up and down until you hit the same exact letter name. This will help fill out the low end of your track and give it some much-needed body, as heard below:
You’ll need some headphones to get a good listen of this one!
As you progress in your music making journey, you’ll likely start to experiment further with your basslines, adding more notes, deviating from the root, giving them groovier rhythms, etc. While we don’t go too wild, we’ve added a bit more flavor to our bassline below to demonstrate, creating some rhythms that match our beat’s kick and jumping back up an octave here and there:
Bonus: Chord inversions
Now that we have our bassline in order, we can go back to our chord progression and quickly touch on inversions. These are chords created by changing the lowest note to something other than the root. While this is totally optional, we demonstrate this technique below by moving a few notes within our progression up and down by an octave, so that all of the chords are contained in a more compact vertical space on our piano roll. The result is a more smooth sounding transition from one chord to the next, without altering the actual core identity of any of the chords.
How to write a melody
Last but certainly not least, let’s add a melody on top of the musical bed we’ve created.
What is melody?
It’s a little hard to define what exactly a melody is—perhaps a succession of tones that are grouped as a singular idea—but we sure know a good one when we hear it.
An effective melody is one that moves us, or replays inside of our minds long after the song is over. Take the tin whistle intro in “My Heart Will Go On.” Although it’s practically a meme, its honest and soaring nature is simply undeniable.
The way the melody shoots higher in its repetition is just so satisfying.
Fortunately, a lot of the terminology surrounding melody overlaps with harmony. That said, we’ll drop our guide dedicated to melody below once more, in case you want to familiarize yourself with the theory fundamentals.
How to create a melody in your DAW
While there are once again no rules when it comes to crafting a melody, we do have more structure compared to when we composed our beat and chord progression.
For one, the chord progression should’ve established a musical key that we’ll most likely want to stick to for our melody as well. If you make your melody land on pitches contained within the chords as they hit, you’ll likely find that it sounds more consonant, or musically stable. On the other hand, you can create a bit of tension by making it hit notes that aren’t within your chords. From there, you can resolve them to more consonant pitches (or don’t) to taste.
One key aspect you’ll want to keep in mind as you create melodies is contour, or the broad ‘shape’ of your melody. Think about how that tin whistle melody in “My Heart Will Go On” repeats some ideas, but reaches higher as it unfolds for emotional effect.
As you make your own music, ask yourself: How can you tell the unique story that you want to tell with your melody?
If you’re going for memorability, the key might be finding a balance between repetition and variation. Repeating smaller phrases within your melody will help listeners follow along, while changes will help add excitement and impact.
Humming over your chord progression until you find something you like, and then trying to recreate it in the DAW might be an effective strategy if you’re stuck. You can also use your DAW’s onscreen keyboard to brainstorm some ideas on a software instrument that you can then use for your melody.
Below, we do exactly that, just messing around over our looped beat and chords until we find an idea that we like. From there, we record it and edit our recording in the piano roll so that it sounds a bit cleaner, adjusting the timing and length of notes to taste:
Leaving your recordings less edited can give them a looser, performed feel. On the other hand, you can also skip recording altogether and directly input your melodies with MIDI, just as we did with our beat, chord progression, and bassline.
Adding layers and additional parts
Now our music is really starting to feel like a track! That said, of course there’s always room for more—after all, many of your favorite songs probably contain more than three or four different sounds in their arrangement. However, you’ll often find that all these sounds actually usually support one of the three pillars (beats, chords, and melodies) we established today. Maybe a sound effect adds some extra accents to the beat. Or, maybe a supporting line harmonizes or doubles a melody.
If you’re feeling ambitious, continue experimenting and adding additional tracks to your project yourself. Perhaps try having multiple instruments play your melody, or adding an entirely new part that intertwines with your beat. The best way to learn how to make music and further develop your ear is to simply try things firsthand. So, we encourage you to spend a lot of time here, just having fun with your DAW.
Below, you can see that we chose to double our melody with another synth to give it some more body. We also threw in some rhythmic synths, which are a neat tool for automatically adding movement to chord progressions:
Developing your idea into a full track
At this point, your music is perhaps just a few seconds long. Once you have a core idea going, you’ll want to expand it into a full song by adding more parts that give it that larger arc.
What is song structure?
As you make your own music, song structure will be your best friend in expanding your individual ideas into full songs. By composing related sections like verses, choruses, and bridges and connecting them together, you’ll be able to really tell a story with your work.
Below, we dive deep into song structure and some popular patterns you’ll want to be aware of.
How to implement song structure in your DAW
Going back to what you made in the DAW, you might be able to create new sections by changing the chord progressions and melodies, or building up or stripping away parts. You’ll find that often, you might not need to change as much as you think to create new sections.
If you’re writing a song with vocals, new and repeated lyrics across different sections will also play a large role in expanding your music. In popular music, different verses often have different lyrics that focus on narrative, while choruses remain more consistent and emphasize broad themes and emotion. That said, of course—say it with us now—there are no hard rules here.
Below, we developed our idea into a full composition by adding an intro, which essentially just isolates a few parts from our main section, and slowly builds into it. We’ve also added a contrasting bridge. The processes for creating this section was exactly the same as how we created our main idea—but notably, we changed up the chord progression and rhythmic accents, which gave it a really neat contrast.
From there, we went back to our main idea to create a feeling of cohesion, and repeated it once for some extra oomph as we headed towards the end. Lastly, we stripped away some parts in the final measures to ease into a close:
Mixing your music
As you laid down all of these parts for your own music, you may have found yourself concerned with how they meshed together. Perhaps one part was too loud and overpowering. Or, maybe you wanted to alter the timbre—or sonic character—of your sound in some way.
One process we haven’t discussed yet that’s crucial when it comes to figuring out how to make music is mixing. While composition is all about sequencing cool rhythms, building emotive chord progressions, and writing memorable melodies, mixing places the focus on the more elusive sonic aspects like making the greater picture sound cohesive, clear, and exciting.
For this process, you’ll need to use a combination of the volume and panning faders on your tracks, in addition to audio effects plugins. In our mixing guide below, we go over the common applications of all of these and discuss what you might want to be thinking about as you mix your own music.
Below, we demonstrate just a few of the many mixing decisions we made along the way for our demo track:
You can see that we evened out the volume for the melody, and panned the two lead synths slightly left and right to create some space and width. We also added an EQ to our bass that attenuated some barely-audible rumbles, and panned the hi-hats as well.
When should you be mixing when you make music?
For the sake of this tutorial, we’ve separated mixing as its own distinct step. This segmentation remains as an effective practice for many veteran musicians as well, who might have a phase where they’re primarily focused on composing, and then a latter phase where they’re focused on mixing, once they have their general ideas down.
That said, as you make more music, you might find that you’re also doing some amount of mixing as you write—and that’s totally okay! In fact, often times a particular audio effect or balancing trick might inform a compositional idea, and vice versa.
Many serious musicians will also ask someone else—perhaps a professional mixing engineer—to mix their tracks. The reason for this is because a fresh and sharp ear might be able to make some choices that yours (which have possibly heard the music hundreds of times by now and lost all objectivity) might miss. However, there’s certainly nothing wrong with mixing your own music either.
Mastering your music
We’re almost at the end—last but not least is mastering. This is the final step in music production where we polish the overall sound, make sure the track translates well across different playback environments, and ensure consistency with the larger body of work (if the song is going to be part of an EP or album).
If you’re just starting out, this step might not be a big concern for you, since distributing your music may not be top of mind (though you can by all means go for it)! However, it’s worth knowing that it exists.
What’s the difference between mixing and mastering?
While we’re tweaking individual sounds in the mixing stage, with mastering we’re really applying slight adjustments at the macro level. “Slight” is the keyword here—if you’re drastically re-balancing individual sounds or adding new parts, you’re probably still mixing or producing.
As with mixing, there are dedicated mastering engineers who devote their entire careers to the art. And for similar reasons, it could be a good idea to eventually have other people master your music.
However, if you’re looking to do it yourself, consider taking at least a few days away from your music so that you can approach it with the freshest ears possible. From there, you can follow our six-step mastering 101 guide to learn more about the tools you’ll be using and the outcomes you’ll be striving for.
And at the very end, don’t forget to export your track so that you can listen to it on the go and even share it with the world!
Our exported demo track—it’s been a long road!
Conclusion: How to make music
If you’ve made it all the way here, congratulations! You’ve learned the full process for how to make music, all the way from finding a DAW to mixing and mastering your work. That said, we truly covered a ton of information today, so don’t worry if you didn’t absorb absolutely everything. Making music is a lifelong journey, so just working through this in any form is an immense first step.
If new questions arose as you were exploring the DAW, or if you’re looking for somewhere to share and receive feedback on your music as you grow, consider joining our Discord for a community of music creators who are constantly exchanging inspiration and knowledge.
We can’t wait to hear what you’ll create!
Explore Splice INSTRUMENT, our virtual instrument plugin that puts an ever-growing catalog of free and premium sounds at your fingertips:
May 9, 2022